How to Create a Course in Moodle
Learn how to create a course in Moodle 4.5, including setting up essential details like course names, categories, and visibility. This beginner's guide requires site administrator or manager permissions.
Moodle version: 4.5 Estimated time: 5 minutes Difficulty: Beginner
Why you'd use this
Every piece of learning content in Moodle lives inside a course. Before you can add activities, upload resources, or enrol students, you need to create the course itself. This guide walks you through creating a new, empty course and configuring its essential settings so it's ready for you to build on.
Before you start
Permissions required:
- Site administrator role, or
- Manager role (site-wide or in the category where you want the course), or
- A role with the capability moodle/course:create assigned at the category level your administrator may have set this up for course creators
Note: Teachers cannot create courses by default. Teachers can only be added to a course once it already exists.
You'll need:
A name for your course (required) and a short name the short name appears in breadcrumbs and navigation menus, so keep it brief and unique.
- The course category you want the course to sit in if you're not sure which category to use, check with your Moodle administrator before you start.
- A rough idea of your course start date.
- An enrolment method in mind (manual enrolment, self-enrolment, or another method) you don't have to configure this now, but it helps to know.
Not sure if you have the right permissions? Go to Site administration in the left-hand navigation if you can see it, you have sufficient access to create courses.
Step-by-step
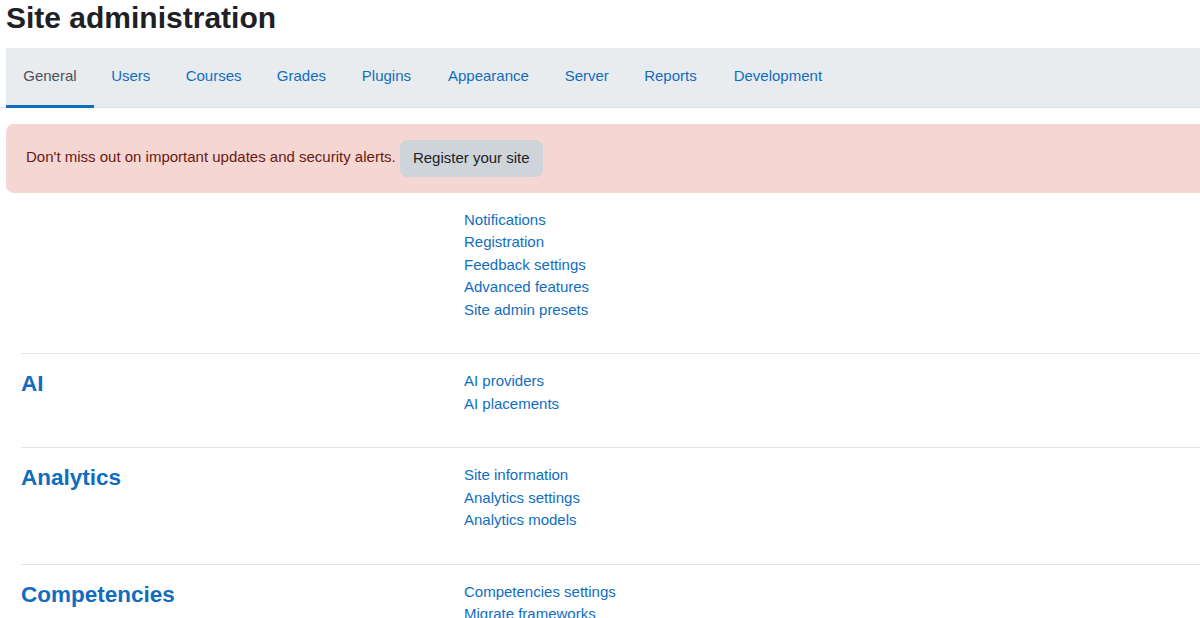
Step 1: Open Site Administration
Click Site administration in the left-hand navigation panel. This opens the site administration area.
Tip: If you don't see Site administration, you may be a Teacher or Student in a course but not a site-level Manager or Administrator. Ask your Moodle administrator to either upgrade your role or create the course for you.
Step 2: Go to the Courses section
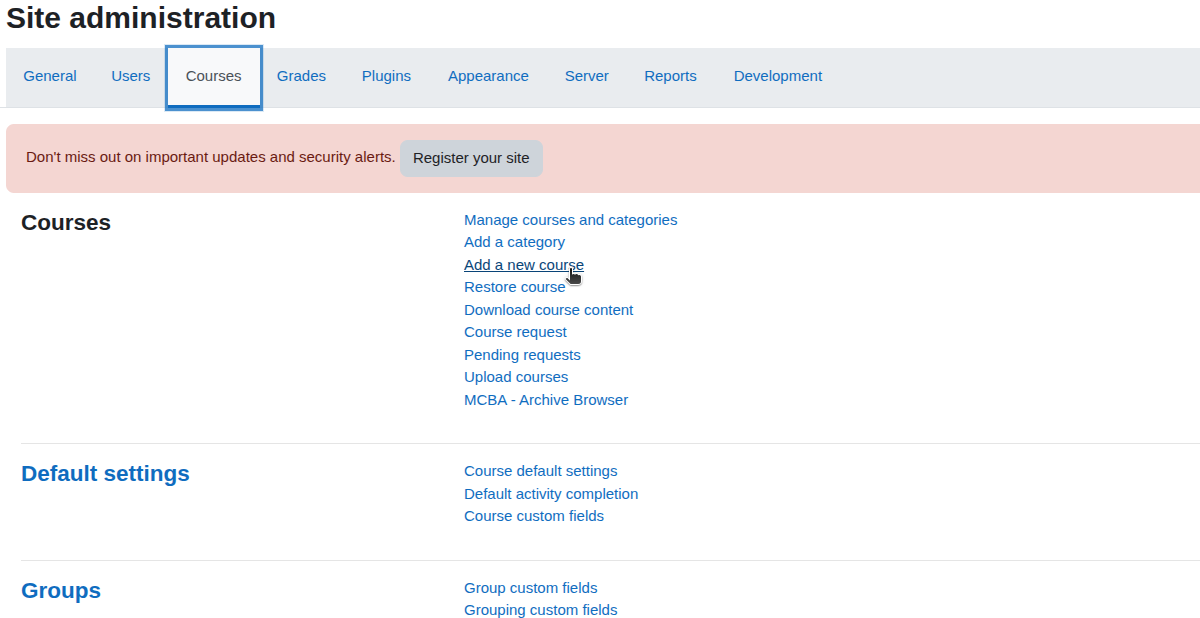
Click the Courses tab at the top of the Site administration page. Then click Add a new course from the options that appear.
Step 3: Enter the course full name
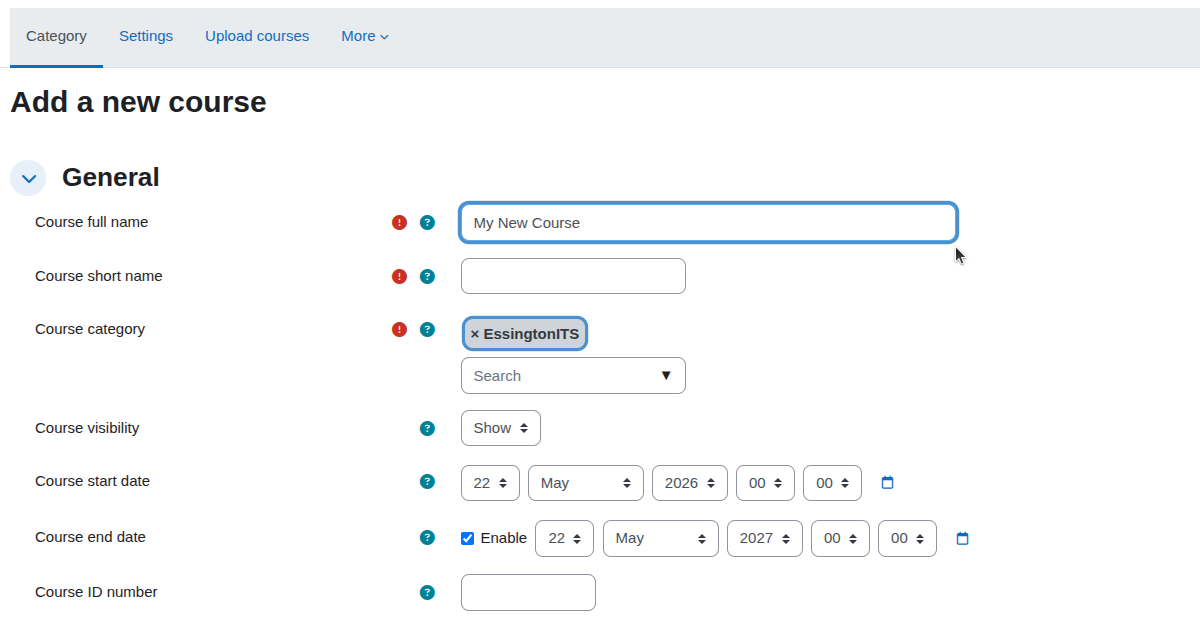
In the Course full name field, type the complete name of your course exactly as you want learners to see it for example, Health and Safety Induction 2026. This is the name displayed on the course page and in search results.
Step 4: Enter the course short name
In the Course short name field, type a brief, unique identifier for example, HSI-2025. This appears in the navigation breadcrumb and in reports. No two courses on your site can share the same short name.
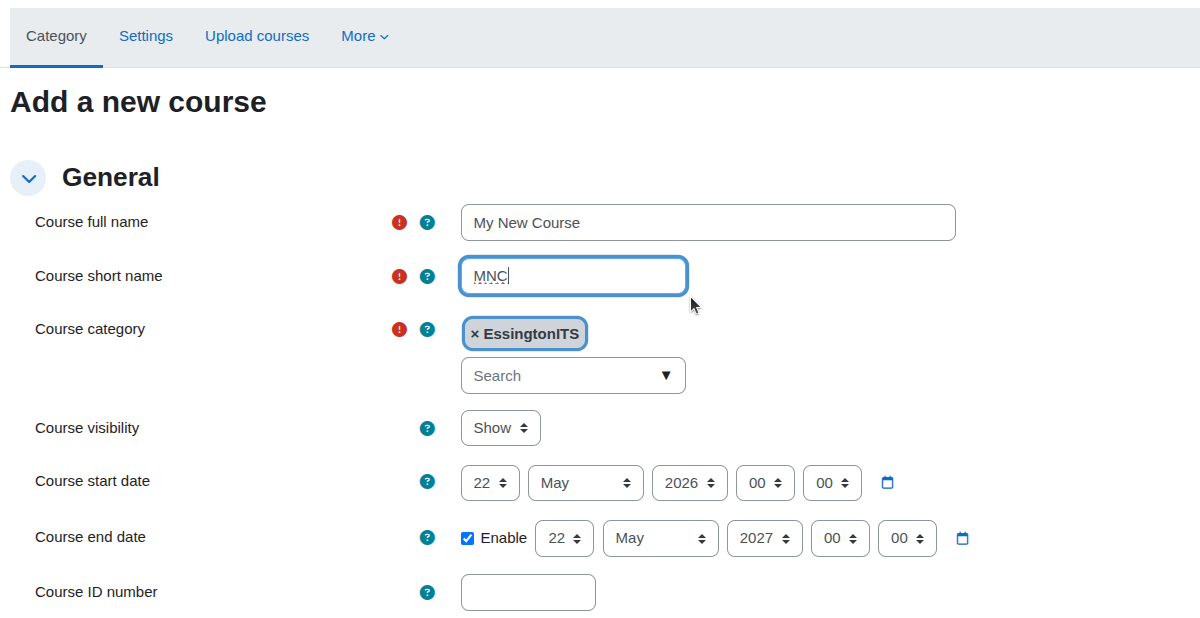
Step 5: Set the course category
Click the Course category dropdown and select the category where this course should live. If the correct category doesn't exist, you'll need to ask your administrator to create it you can't add a new category from this screen.
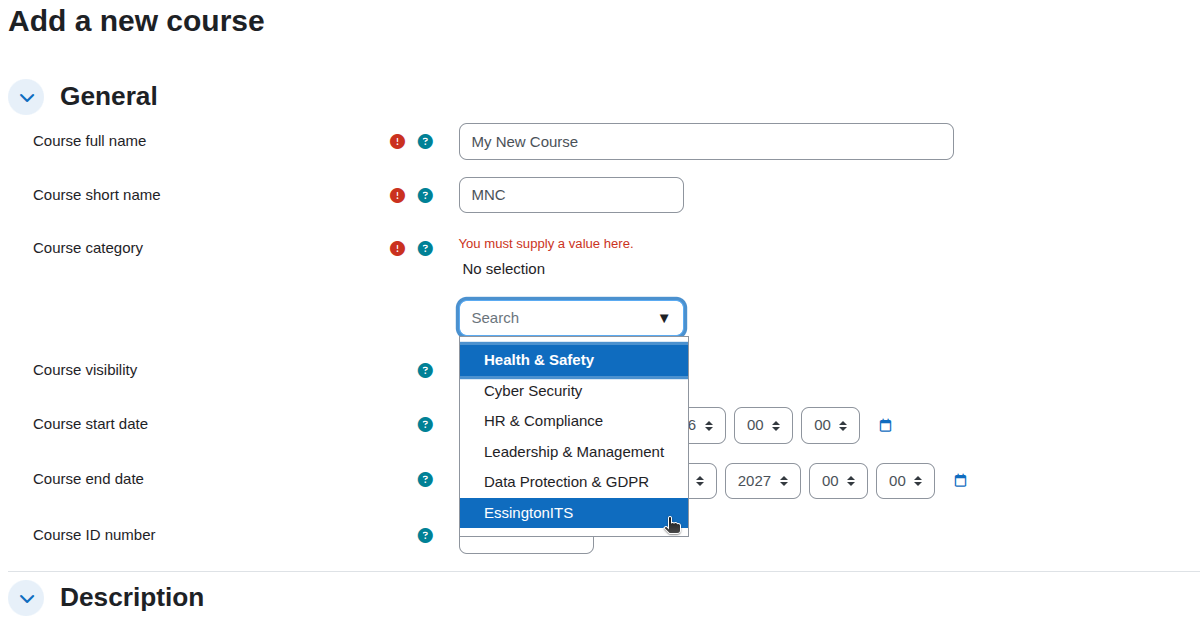
Step 6: Set the course visibility
Locate the Course visibility setting:
- Choose Show if you want students to be able to see the course immediately once enrolled.
- Choose Hide if you want to keep the course invisible to students while you're still building it. (You can change this at any time.)
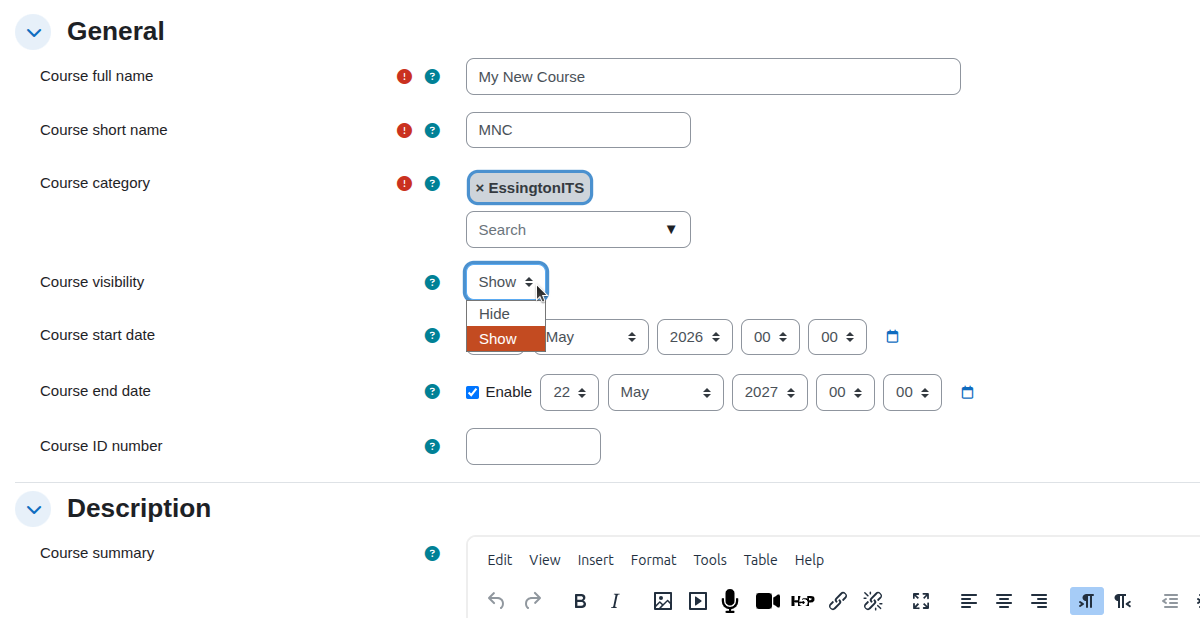
Tip: It's good practice to leave the course hidden while you're setting it up, then switch to Show when it's ready.
Step 7: Set the start date
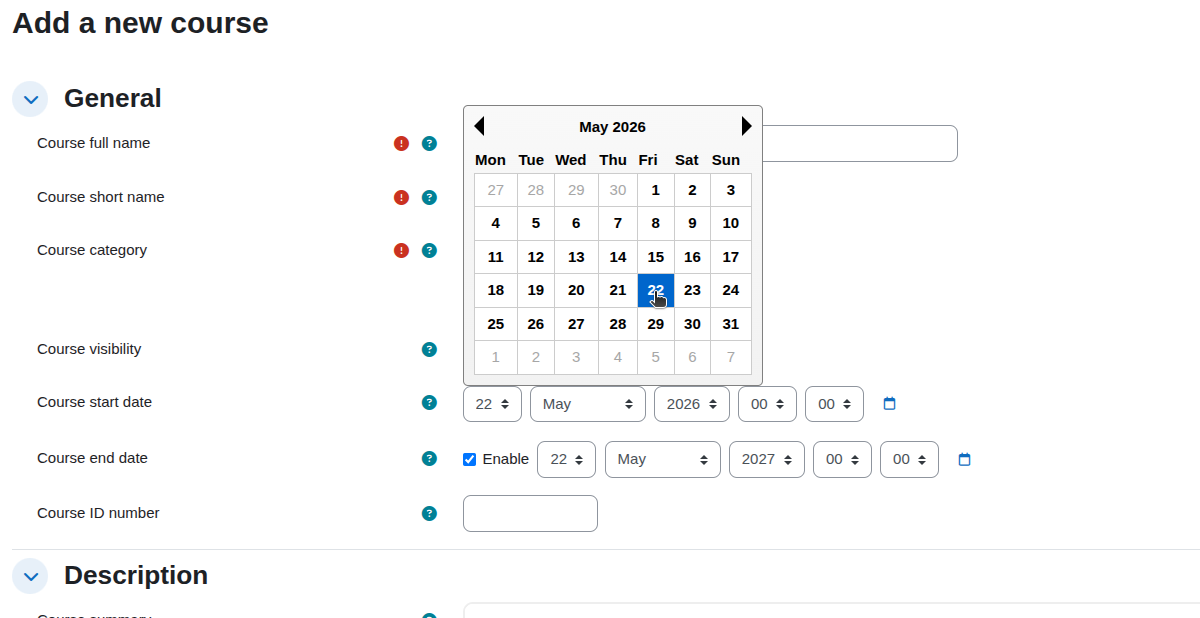
Click the Course start date fields and set the date your course begins. This affects how the course appears in timelines and, if you're using a weekly format, it determines which week is "Week 1."
Step 8: Set the course end date (optional)
If your course has a fixed end date, turn on the Enable checkbox next to Course end date and set the date. After this date, students cannot post to the course but can still view content. Leave this disabled if your course runs indefinitely.
Step 9: Choose a course format
Scroll down to the Course format section. Click the Format dropdown and choose how your course content will be organised:
- Topics format: content is divided into numbered or named topics (most common)
- Weekly format: content is divided into weekly sections, auto-labelled by date
- Single activity format: the course contains just one activity (useful for a single quiz or SCORM package)
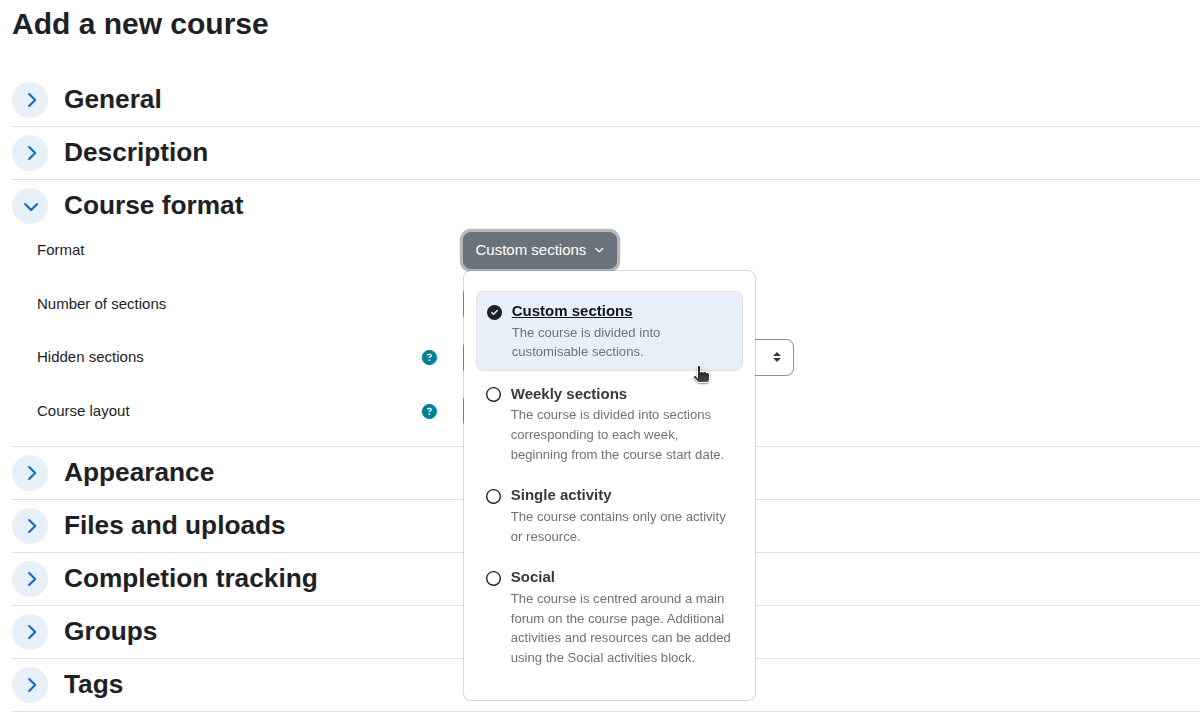
Verify: confirm these are still the main format options available in Moodle 4.5, and check if any new formats are bundled by default.
Step 10: Set the number of sections
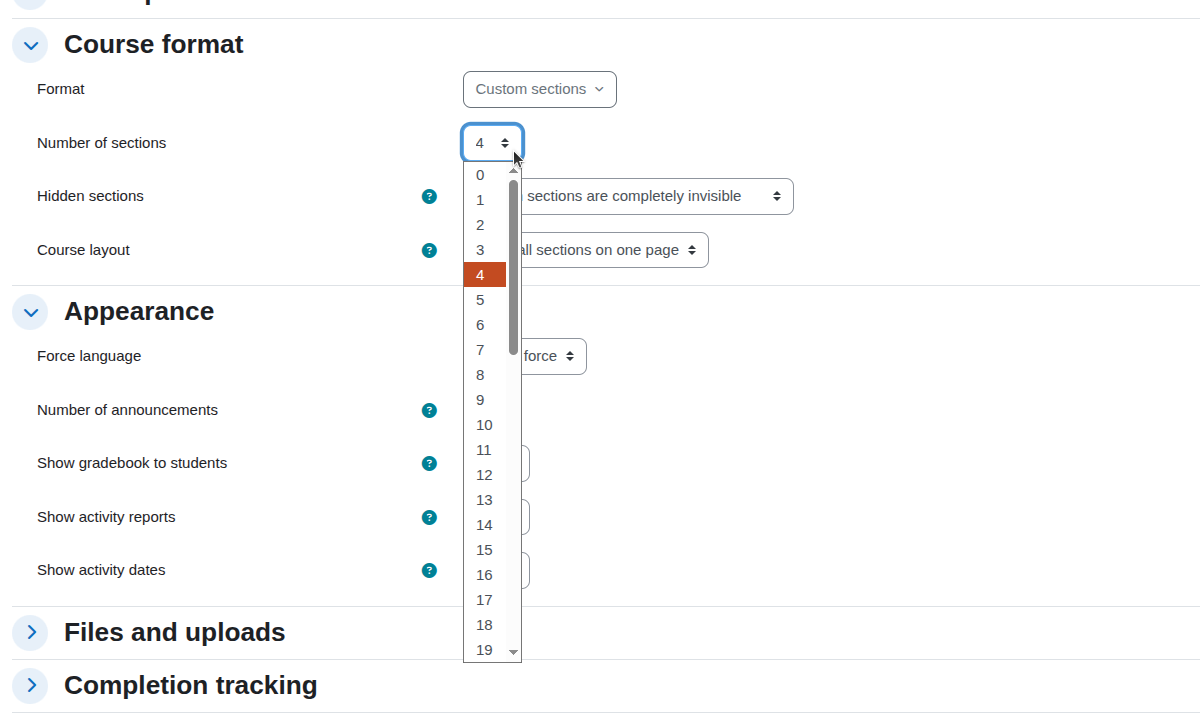
In the Number of sections field (visible for Topics and Weekly formats), enter how many topics or weeks your course will have. You can add or remove sections later, so don't worry about getting this exactly right.
Step 11: Save the new course
Scroll to the bottom of the page and click Save and display. Moodle creates the course and takes you straight to the empty course page.
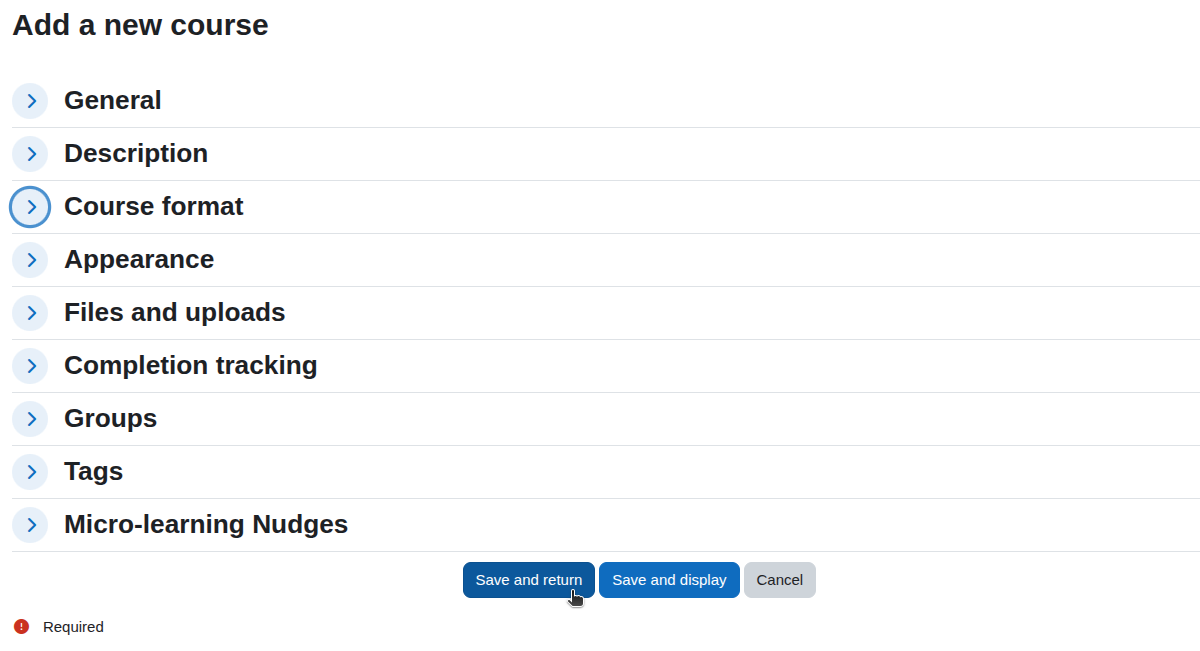
Note: Clicking Save and return instead will return you to the course list without opening the new course. Either is fine just be aware of the difference.
Check it worked
After saving, you should land on your new course page. The course name appears as the page heading, and you'll see the empty topic or weekly sections you configured. At the top of the page, you should see a confirmation bar or be in Edit mode ready to start adding content.
To confirm the course is in your system, go to Site administration > Courses > Manage courses and categories and look for your new course in the correct category.
Common problems
- "Short name is already in use": Every course must have a unique short name. Add a year, cohort code, or another distinguishing suffix (e.g. change Induction to Induction-2025-A).
- "I can't see the category I need": Categories must already exist before you can assign a course to them. Ask your Moodle administrator to create the missing category.
- The course is visible in my list but students say they can't find it: Check two things: (1) Course visibility is set to Show, and (2) the students have actually been enrolled — a visible course is still only accessible to enrolled users.
- I saved the course but it's in the wrong category: Go to the course, click Settings (the cog icon or via the Course administration menu), scroll to Course category, change it, and click Save and display.
Looking to enhance your Moodle experience? EssingtonITS offers expert IT services to optimise your learning platforms. For tailored Moodle hosting and support, explore our dedicated e-learning services at myelms.co.uk. Let us help you achieve seamless and efficient e-learning solutions.
Moodle is a registered trademark of Moodle Pty Ltd. This channel is independently operated by EssingtonITS and is not affiliated with or endorsed by Moodle.
person people found this useful.